Overtime I have done a little bit of everything when it comes to residential houses and construction, but stairs is something I never have really been a part of. Luckily some of the guys I work with are extremely talented in this area and were able to show me the way.
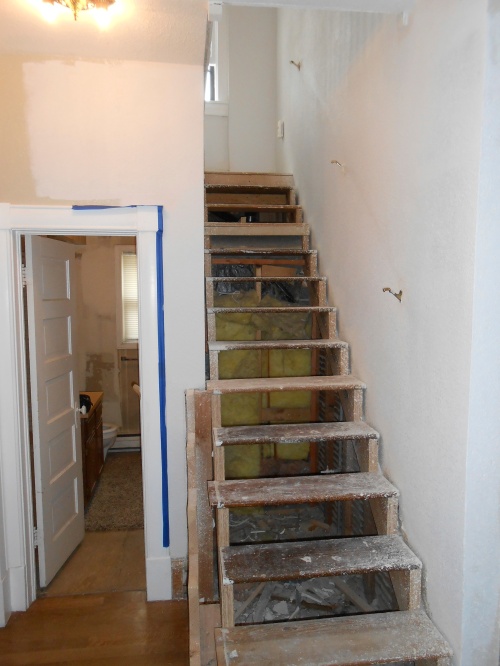
As you can see, we completely ripped out the old staircase. It was very steep and had treads that were not very large. It had its day, but it was worn out, modified numerous times and had become an after thought in this otherwise beautiful house.  Our goal was to cut new stringers that had a less steep rise and run, allowing us to have bigger treads and a safer walk down the stairs. To do this the first thing we had to do was gain space for an extra step. The next picture shows you where we took the original large landing and made it into two different landings. The plywood area is where we lowered the stair case.
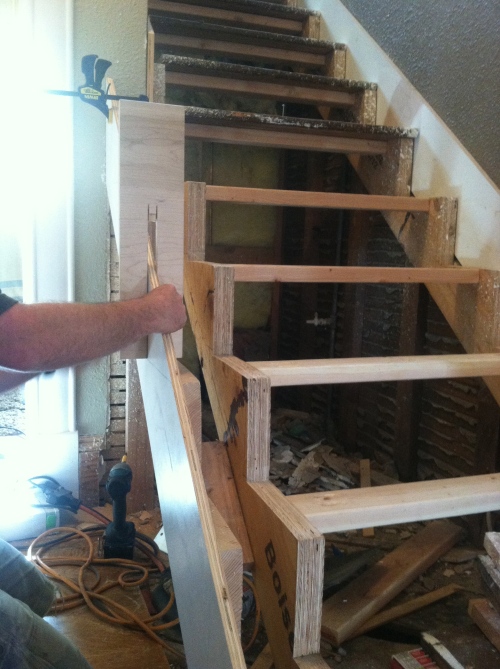
 Next we used two LVLs to cut our new stringers. LVLs give you a strong stable material to work with when you are using lumber that is this long. It required some trial and error to make our stairs land where we wanted in the living room. Once installed, we temporarily screwed down the old treads to have a working platform.
  I then fixed the plaster and lath on both sides of the stairs where we exposed the studs. The flatter and straighter that you can get this area the better, especially if you plan on installing wainscoting and large skirt boards up the stairs later.
 Now you can see we have installed the skirt boards up the side of the stringers, we spaced our stringer out away from the wall to allow us to slide the skirt boards down behind the stringers, this prevents you from having to cut and notch each stair to fit your skirt boards.
 We then moved on to the riser work. This is were the real technical and fine finish work begins. This involves some skill and experience to make the finished product look right. The picture below shows your outside board that is one piece, mitered to each of the 6 risers which are also mitered and fit to the outside board with great precision. You can really spot true craftsmanship, I was impressed with my friends eye for detail when we got into this part. Those clean miters you see below are freshly cut and do not have touch up paint or caulking on them. They are perfectly cut, with each stair requiring a slightly different angle.
 The treads were then fitted and put on, these will have stained cove that finishes the transition from the tread to the riser, where you see the gaps. Now that the layout is done, it is time to make custom newel posts.

